Monday, 28 October 2013

half-cut christmas card

Here is a christmas card in three versions. It was made based on the steps of half-cut card I posted, only I did not make a trifold on the larger portion of the card (only where I made the half-cut with the die).
 
version 1

version 2

version 3

another way of doing the half cut card

Here is another way of making the half-cut card:
 
 
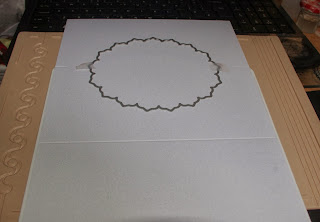
Firstly, score a card to make a trifold style. The other trifold mark is only along the edges. This is where you will die cut. ( The pencil mark here is just to show for demonstration.)

 Then, lay the die of your choice on the area that you did not fully score in such a manner that it is halway (central) of the crease. Be sure to tape the die on the card using low tack tape.

This time instead of the larger portion of the card hanging on the cutting plate, it is the shorter portion with half of the die.

Postion the base plate on top and run through the machine, inserting the hanging portion first.

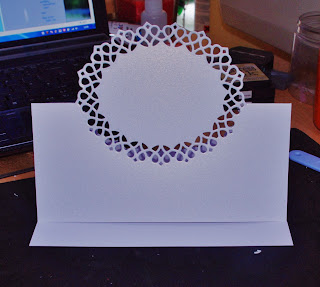
Remove the die and complete the crease to the edge of the cut and it should look like this now.

Lay down the other parts of the die in the center of the cut as you wish, tape and then cut.

Remove the dies and bits and pieces

Fold the creases/ scores

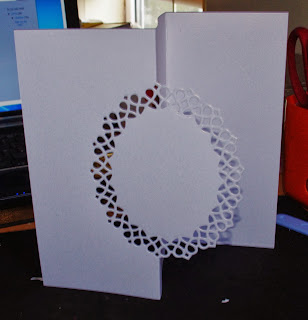
Here is  one style you can do.

Another one (the same as the first demo I made

And another one
Design as you wish.
 
(NOTE: This method is only apllicable to dies with separate borders like the Tonic Verso and the Indulgence Dies.)

half-cut die card

 
Hi, here is how to make a half cut card using dies.
 
 
Firstly, score a card  to make a trifold style. The other trifold mark is only along the edges. This is where you will die cut. ( The pencil mark here is just to show for demonstration.)

Then, lay the die of your choice on the area that you did not fully score in such a manner that it is halway (central) of the crease. Be sure to tape the die on the card using low tack tape.

Position the card on the cutting plate, in a way that the larger potion is halnging out of the plate and that only half of the die is on the plate (the edge of the cutting plate in alligned to the 2 short scored edges of the card).

Put the base plate on top of the cutting plate (the card is sandwich in between). Run the plate in the machine, inserting the hanging card first.

Remove the die and complete the crease to the edge of the cut and it should look like this now.

Lay down the other parts of the die in the center of the cut as you wish, tape and then cut.

Remove the dies and bits and pieces.
 
 
Score the lower edge to about a centimetre and fold, then fold the card so that the creased fold meets the trifold score on the lower side of the die cut.
Fold the other trifold crease. Glue the centimetre foldto the edge of the other edge of the part that you fold backward to show the die cut image. Design as you wish.
 
There is another of doing this, but I'll do it next time. Enjoy!
 
(NOTE: This method is only apllicable to dies with separate borders like the Tonic Verso and the Indulgence Dies.)

Thursday, 24 October 2013

christmas card


A christmas card made using Tonic Die collection (ribbon one) and punches (edger and petal pairs)

Wednesday, 23 October 2013

random card

 
Just finished this while tidying my craftroom a while ago.

Tuesday, 22 October 2013

Monday, 21 October 2013

Making an envelope using we r memory keeper envelope punch board

To make an envelope for 7x7 or 8x8 cards use the following measurements which I worked out when  I received my envelope punch board. The punch board gives us only a maximum of 6x8 1/2, but I make mostly 7x7, 8x8 and A5 cards.
 
  Card Size (in)                Paper Size  (in)               Score Line(in)
     7x7                                 11x11                                 5 1/2
     8x8                             12 1/4 x 12 1/4                       6 1/8  (for very flat cards)
     8x8                             12 1/2 x 12 1/2                       6 1/4  (for decoupage or 3d cards)


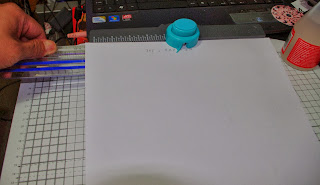
 Firstly, cut the correct paper size. In this case 11x11 since i am making a 7x7 card.

 
Then, put the paper in the punch board. The score line is only limited to 5 in., so, the solution is to get a ruler and and lay it on the punch board so that any of the number will be in line with the number 5 on the score line (i.e. 10 on ruler 5 on score line. 9 in the ruler then will be your 6 in.). line the paper, then between the 9 and 10, that will be the 5 1/2 line then.
 
 
Punch the paper and score/creased.

 
Align the score guide with the score line you made on the paper to make the punch on the next side. Score and punch. Repeat this, till all the four sides are scored/creased and punched.

 
Now, all the sides are punched and scored/creased. Begin folding on the the scored/creased line, then glue


Voila!, you have the perfect envelope for your card. Hope this will be helpful to everyone using the We R Memory Keeper Envelope Punch Board.


paper cactus


i made this paper cactus the other night. very easy and worth your time making.

Saturday, 19 October 2013

wedding anniversary card


Here is a wedding anniversary card requested by a friend at work for his wife.

Wednesday, 9 October 2013

box


here is a useable box i made using the pattern on the 5th birthday hunkydory magazine.

Sunday, 6 October 2013

lady of the night card


This is a shaped card where i tried colouring and i think it wasn't that bad